
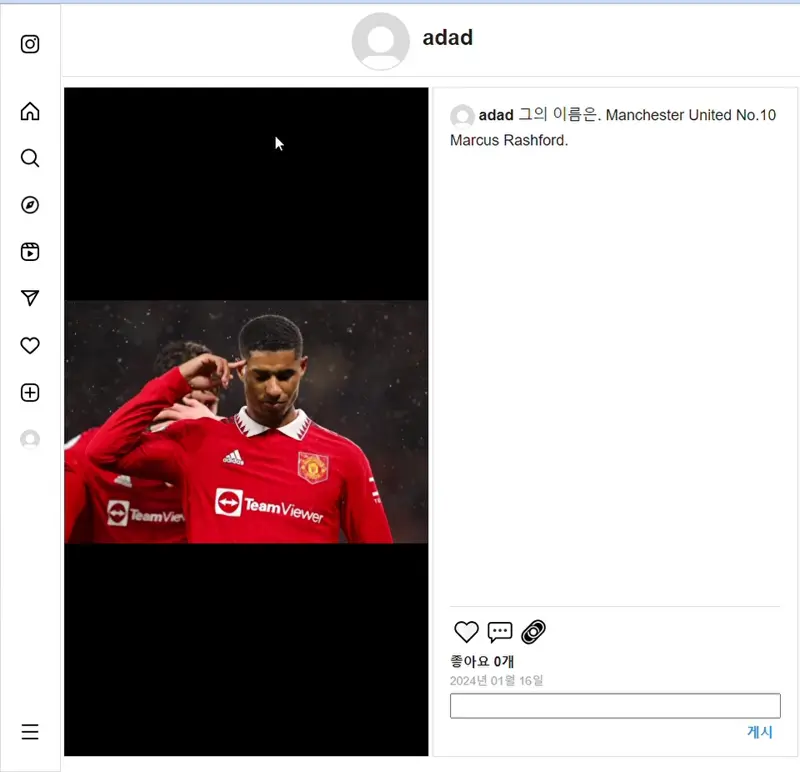
인스타그램의 대표 기능이라고 볼 수 있는 좋아요 기능...
이번 게시글은 구현하면서 함께 글을 작성하는 중이라서 아직 모르긴 하는데 지금까지 해왔던 것들에 비하면 나름 쉽게 구현할 수 있을 것 같은데...?
일단 DB에 좋아요 정보를 저장해야 하므로 모델을 하나 만들어준다.
package com.kimdev.kimstagram.model;

import lombok.AllArgsConstructor;
import lombok.Builder;
import lombok.Data;
import lombok.NoArgsConstructor;
import org.hibernate.annotations.CreationTimestamp;

import javax.persistence.*;
import java.sql.Timestamp;

@Builder
@NoArgsConstructor
@AllArgsConstructor
@Data
@Entity
public class PostLike {

    @Id
    @GeneratedValue(strategy = GenerationType.IDENTITY)
    private int id;

    // 좋아요를 누른 사람
    @ManyToOne
    @JoinColumn(name="accountid")
    public Account account;

    // 좋아요 대상 게시글
    @ManyToOne
    @JoinColumn(name="postid")
    public Post post;

    @CreationTimestamp
    private Timestamp createDate;
}
게시물에 들어갈 때, 좋아요 정보를 반환받아서 하트 버튼의 색을 다르게 출력한다.
<div id="post_infoBox_buttons" style="display: flex; flex-direction: row; margin-bottom: 4px">
    <script>
        $.ajax({
        type: "GET",
        url: "/getPrincipal",
        headers: {'Authorization':localStorage.getItem('Authorization')},
        contentType: "application/json; charset=utf-8",
        }).done(function(resp) {
            principal = resp;
            var accountId = principal.id;
            var postId = "${post.id}";
            $.ajax({
                type: "GET",
                url: "/post/getLike?accountId=" + accountId + "&postId=" + postId,
                contentType: "application/json; charset=utf-8"
            }).done(function(resp) {
                if (resp === 1) {
                    document.getElementById('likeOrUnlike').innerHTML = '<div id="unLikeButton" class="buttons" onclick="Unlike()"><span>❤️</span></div>';
                } else {
                    document.getElementById('likeOrUnlike').innerHTML = '<div id="likeButton" class="buttons" onclick="Like()"><span>🤍</span></div>';
                }
            }).fail(function(error) {
                console.log(JSON.stringify(error));
            });
        }).fail(function (resp) {
        });
    </script>
    <div id="likeOrUnlike"></div>
    <div id="messageButton" class="buttons"><span>💬</span></div>
    <div id="shareButton" class="buttons"><span>🔗</span></div>
</div>
여기서 "/post/getLike"의 GetMapping 컨트롤러는 아래와 같다.
@GetMapping("/post/getLike")
public int getLike(@RequestParam int accountId, @RequestParam int postId) {
    Account principal = accountRepository.findById(accountId).get();
    Post post = postRepository.findById(postId).get();

    ArrayList<PostLike> postLikes = postLikeRepository.findAllByAccountAndPost(principal, post);
    return postLikes.size() > 0 ? 1 : 0;
}
그럼 이제 Like()와 Unlike()를 구현해야겠지?
우선 좋아요 기능을 하는 Like()는 좋아요 버튼을 누르면, 우선 해당 게시글의 좋아요 수를 +1 해준다.
그리고 principal과 해당 post의 정보를 Body로 보내서 서버에서 받아 PostLike 클래스를 생성하여 DB에 저장한다.
jsp에서는 기존의 버튼(🤍)을 삭제하고 새로운 버튼(❤️)을 만들고, 좋아요 수를 +1 해서 html을 업데이트 한다.
@PostMapping("/postLike")
public int postLike(@RequestBody postLikeDTO postLikedto) {
    int result = postService.postLike(postLikedto);
    return result;
}
@Transactional
public int postLike(postLikeDTO postLikedto) {
Account principal = accountRepository.findById(postLikedto.getPrincipalId()).get();
Post post = postRepository.findById(postLikedto.getPostId()).get();
int ret_likes = post.getLikecount();
post.setLikecount(ret_likes + 1);
PostLike postLike = new PostLike();
postLike.setAccount(principal);
postLike.setPost(post);
postLikeRepository.save(postLike);
return ret_likes + 1;
}function Like() {
let data = {
principalId: principal.id,
postId: document.getElementById("post_id").innerText
};
$.ajax({
type: "POST",
url: "/postLike",
data: JSON.stringify(data),
contentType: "application/json"
}).done(function (resp) {
document.getElementById('likeOrUnlike').removeChild(document.getElementById('likeButton'));
document.getElementById('likeCounts').innerText = "좋아요 " + resp + "개";
var likeButtonDiv = document.createElement('div');
likeButtonDiv.id = 'likeButton';
likeButtonDiv.className = 'buttons';
likeButtonDiv.innerHTML = '<span>🤍</span>';
document.getElementById('likeOrUnlike').appendChild(likeButtonDiv);
}).fail(function (error) {
alert(JSON.stringify(error));
});
}
이제 좋아요를 취소하는 Unlike()를 구현해보자.
Like()와 반대로 Unlike()는 좋아요 취소 버튼을 누르면, 해당 게시글의 좋아요 수를 -1 해준다.
그리고 principal과 해당 post의 정보를 Body에 담아 보내서 서버에서 받아 해당 principal의 id와 post의 id를 통해 해당 postLike 클래스를 삭제한다.
jsp에서는 기존의 버튼(❤️)을 삭제하고 새로운 버튼(🤍)을 만들고, 좋아요 수를 -1 해서 html을 업데이트 한다.
@DeleteMapping("/postUnlike")
public int postUnlike(@RequestBody postLikeDTO postLikedto) {
    int result = postService.postUnlike(postLikedto);
    return result;
}
@Transactional
public int postUnlike(postLikeDTO postLikedto) {
Account principal = accountRepository.findById(postLikedto.getPrincipalId()).get();
Post post = postRepository.findById(postLikedto.getPostId()).get();
int ret_likes = post.getLikecount();
post.setLikecount(ret_likes - 1);
postLikeRepository.deleteByAccountAndPost(principal, post);
return ret_likes - 1;
}function Unlike() {
let data = {
principalId: principal.id,
postId: document.getElementById("post_id").innerText
};
$.ajax({
type: "DELETE",
url: "/postUnlike",
data: JSON.stringify(data),
contentType: "application/json"
}).done(function (resp) {
document.getElementById('likeOrUnlike').removeChild(document.getElementById('unLikeButton'));
document.getElementById('likeCounts').innerText = "좋아요 " + resp + "개";
var likeButtonDiv = document.createElement('div');
likeButtonDiv.id = 'likeButton';
likeButtonDiv.className = 'buttons';
likeButtonDiv.innerHTML = '<span>🤍</span>';
likeButtonDiv.onclick = Like;
document.getElementById('likeOrUnlike').appendChild(likeButtonDiv);
}).fail(function (error) {
alert(JSON.stringify(error));
});
}여하튼 이런 식으로 하면, DB에 좋아요 정보가 등록/삭제되어 좋아요 기능이 구현된다.
'프로젝트 > Kimstagram' 카테고리의 다른 글
| [내멋대로 만드는 Kimstagram] 9. 팔로우 기능 구현하기 (1) | 2024.01.24 |
|---|---|
| [내멋대로 만드는 Kimstagram] 8. 프로필 수정 (0) | 2024.01.21 |
| [내멋대로 만드는 Kimstagram] 6. 게시글 화면 구현과 댓글 작성하기 (0) | 2024.01.21 |
| [내멋대로 만드는 Kimstagram] 5. 프로필 화면 만들기 (0) | 2024.01.21 |
| [내멋대로 만드는 Kimstagram] 4. 글쓰기 구현하기 (0) | 2024.01.16 |


