
사실 게시글 화면도 인스타그램의 화면을 그대로 클론하려고 했는데 어려워서 포기했다...
프론트 쪽 지식은 거의 전무해서 ㅋㅋㅋ 그냥 최대한 인스타그램 느낌이 살도록 내가 커스텀 해서 만들었다.
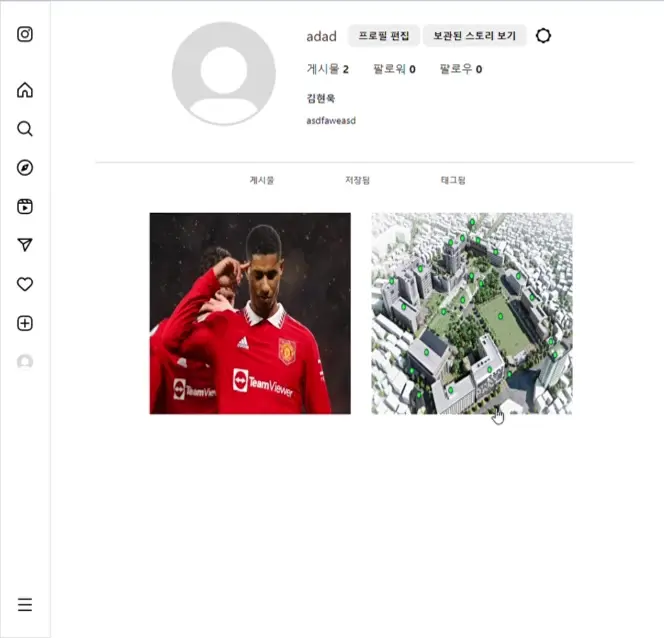
일단 결과물부터 업로드...
1. Controller
주소로 게시글ID를 받는다. 이 컨트롤러에서는 게시글ID를 받아서 해당 게시글을 가지고 post를 찾아서 Model에 함께 넘겨준다.
그리고 replyRepository에 findAllByPost()를 만들어서 방금 찾은 post에 달린 replies(댓글) 목록을 찾아서 함께 Model에 넘겨준다.
@GetMapping("/post/{postId}")
public String write(@PathVariable int postId, Model model) {
    Post post = postRepository.findById(postId).get();
    ArrayList<Reply> replies = replyRepository.findAllByPost(post);

    model.addAttribute("post", post);
    model.addAttribute("replies", replies);

    return "home/post";
}
아 참고로 Reply 모델은 아래와 같다.
package com.kimdev.kimstagram.model;

import lombok.AllArgsConstructor;
import lombok.Builder;
import lombok.Data;
import lombok.NoArgsConstructor;
import org.hibernate.annotations.CreationTimestamp;

import javax.persistence.*;
import java.sql.Timestamp;

@Builder
@NoArgsConstructor
@AllArgsConstructor
@Data
@Entity
public class Reply {

    @Id
    @GeneratedValue(strategy = GenerationType.IDENTITY)
    private int id;

    @Lob
    public String comment;

    @ManyToOne
    @JoinColumn(name="accountid")
    public Account account;

    @ManyToOne
    @JoinColumn(name="postid")
    public Post post;

    @CreationTimestamp
    private Timestamp createDate;
}
2. 게시글에 사진 띄우기
업로드한 사진을 띄우는 로직은 아래와 같이 작성했다.
우선 처음 해당 게시글에 들어가면, 게시글의 0.jpg를 화면에 띄운다. 이 때 currentIdx는 0이다.
그리고 다음/이전 버튼을 누를 때마다 js를 동작시켜서 currentIdx를 +1 또는 -1 한 후, 해당 인덱스의 이름을 가진 파일으로 이미지를 업데이트 시킨다.
물론 이 때 이미지 정보는, 컨트롤러에서 Model에 함께 보낸 post 변수에 함께 담겨 있다.
<div id="post_imagesBox" class="post_imagesBox">
    <div id="post_imageConatiner"><img src="/posts/${post.id}/0.jpg" style="max-width: 100%; height: auto;"></div>
    <div id="imagePrevButton" class="imagePrevNextButton" style="left: 10px">
        ◀
    </div>

    <div id="imageNextButton" class="imagePrevNextButton" style="right: 10px">
        ▶
    </div>
</div>
// 사진 표기
let currentIdx = 0; // 시작 사진 인덱스
var postId = document.getElementById("post_id").innerText;
var post_picsize = document.getElementById("post_pic_size").innerText;
const imagePath = '/posts/' + postId + '/'; // 사진의 기본 경로
const imageContainer = document.getElementById('post_imageConatiner');
const prevButton = document.getElementById('imagePrevButton');
const nextButton = document.getElementById('imageNextButton');
prevButton.style.display = currentIdx === 0 ? 'none' : '';
nextButton.style.display = currentIdx === post_picsize-1 ? 'none' : '';
document.getElementById('imagePrevButton').addEventListener('click', () => {
currentIdx = (currentIdx - 1 + post_picsize) % post_picsize;
updateImage();
prevButton.style.display = currentIdx === 0 ? 'none' : '';
nextButton.style.display = currentIdx === post_picsize-1 ? 'none' : '';
});
document.getElementById('imageNextButton').addEventListener('click', () => {
currentIdx = (currentIdx + 1) % post_picsize;
updateImage();
prevButton.style.display = currentIdx === 0 ? 'none' : '';
nextButton.style.display = currentIdx === post_picsize-1 ? 'none' : '';
});
function updateImage() {
const imageUrl = `${imagePath}${currentIdx}.jpg`;
imageContainer.innerHTML = `<img src="${imageUrl}" style="max-width: 100%; height: auto;">`;
}
3. 게시글의 커멘트와 댓글 띄우기
커멘트는 Model에 넘긴 post 변수에 있는 comment를 활용하면 된다. ${post.comment}를 작성하면 끝.
댓글은 ? 댓글 역시 Model에다가 해당 게시글의 replies 목록을 넘겼었다.
replies의 요소 하나 하나마다 반복문을 돌면서 div를 추가해주면 된다.
<div id="commentAndReply" style="height: 600px; border-bottom: 1px solid #dbdbdb; margin-bottom: 10px; overflow: auto">
    <div id="post_comment" style="margin-bottom: 20px">
        <c:choose>
            <c:when test="${post.account.use_profile_img eq 1}">
                <img src="/image/profile/${post.account.username}/profile.jpg" class="profileMini">
            </c:when>
            <c:otherwise>
                <img src="/image/profile/default.jpg" class="profileMini">
            </c:otherwise>
        </c:choose>
        <span style="font-weight: bold; font-size: 18px">${post.account.username} <span style="font-weight: normal">${post.comment}</span></span>
    </div>
    <span></span>
    <!-- 댓글 출력 -->
    <div id="post_replyBox">
        <c:forEach var="reply" items="${replies}">
            <div id="post_reply" style="margin-top: 10px">
                <c:choose>
                    <c:when test="${reply.account.use_profile_img eq 1}">
                        <img src="/image/profile/${reply.account.username}/profile.jpg" class="profileMini">
                    </c:when>
                    <c:otherwise>
                        <img src="/image/profile/default.jpg" class="profileMini">
                    </c:otherwise>
                </c:choose>
                <span style="font-weight: bold; font-size: 16px">${reply.account.username} <span style="font-weight: normal">${reply.comment}</span></span>
            </div>
        </c:forEach>
    </div>
</div>
4. 댓글 작성
가장 애먹었던 부분이 여기서였다.
댓글을 작성하면 replyRepository에 작성한 댓글의 정보를 save()해주면 댓글 작성 자체는 완료 되는데,
새로고침을 하지 않으면 내가 작성한 댓글이 바로 보이지 않는다는 점이 문제였다...
결국 내가 고안한 방법은(물론 챗GPT와 함께...),
ajax로 POST 요청으로 댓글 작성 요청을 보낸 다음, 댓글 작성이 정상적으로 완료되면 서버에서는 해당 게시글의 전체 댓글 목록을 다시 반환한다. 이 때 내가 새로 작성한 댓글 목록도 함께 반환된다.
그러면 그 목록을 받아서, js를 통해 다시 댓글 목록 div를 업데이트한다.
그러면 내가 작성한 댓글까지 댓글 목록에 추가된 채로 업데이트가 되어, 내가 작성한 댓글이 새로고침 없이도 보이게 된다.
작성한 소스 코드는 아래와 같다.
function postReply(postId) {
    var comment = document.getElementById("post_commentInput").value;

    if (!comment) {
        alert("댓글을 입력해 주세요.");
    } else {
        let data = {
            comment: comment,
            accountId: principal.id,
            postId: postId
        };

        $.ajax({
            type: "POST",
            url: "/postReply",
            data: JSON.stringify(data),
            contentType: "application/json"
        }).done(function (resp){
            alert("댓글이 작성되었습니다.");
            updateReplies(resp);
        }).fail(function(error){
            alert(JSON.stringify(error));
        });
    }
}

function updateReplies(resp) {
    var replyBox = $("#post_replyBox");

    replyBox.empty();

    for(var i=0; i<resp.length; i++) {
        reply = resp[i]
        var profileImgSrc = reply.account.use_profile_img === 1
            ? "/image/profile/" + reply.account.username + "/profile.jpg"
            : "/image/profile/default.jpg";

        // 동적으로 생성한 HTML 추가
        replyBox.append(
            '<div id="post_reply" style="margin-top: 10px">' +
            '<img src="' + profileImgSrc + '" class="profileMini">' +
            '<span style="font-weight: bold; font-size: 16px">' + " " + reply.account.username + " " +
            '<span style="font-weight: normal">' + reply.comment + '</span>' +
            '</span>' +
            '</div>'
        );
    }
    $("#post_commentInput").val('');
}
새로고침 없이도 HTML을 수정할 수 있다는 점이... 새삼 ajax의 위력을 다시 한 번 느끼게 해 준다...
'프로젝트 > Kimstagram' 카테고리의 다른 글
| [내멋대로 만드는 Kimstagram] 8. 프로필 수정 (0) | 2024.01.21 |
|---|---|
| [내멋대로 만드는 Kimstagram] 7. 게시물 좋아요 구현하기 (0) | 2024.01.21 |
| [내멋대로 만드는 Kimstagram] 5. 프로필 화면 만들기 (0) | 2024.01.21 |
| [내멋대로 만드는 Kimstagram] 4. 글쓰기 구현하기 (0) | 2024.01.16 |
| [내멋대로 만드는 Kimstagram] 3.Spring Security + JWT 로그인 구현하기 (1) | 2024.01.09 |


