
반응형
글쓰기를 구현했으니, 이제 그 유저의 프로필 화면을 구현할 수 있게 되었다.
프로필 폼에는 유저의 정보와 게시물, 팔로잉 정보가 보여야 한다.
유저의 정보는 주소에 입력한 username으로 accountRepository에서 해당 account를 찾아서 Model에 같이 넘겨주었다.
그리고 그 유저가 작성한 게시글 목록도 함께 jsp로 이동되어야 하므로, 찾은 account를 가지고 post를 찾을 수 있도록 postRepository에 findAllByAccount를 만들어 활용한 후 posts 리스트도 Model에 함께 추가해 주었다.
@GetMapping("/profile/{username}")
public String profile(@PathVariable String username, Model model) {
    Account user = accountRepository.findByUsername(username).get();
    ArrayList<Post> posts = postRepository.findAllByAccount(user);

    model.addAttribute("user", user);
    model.addAttribute("posts", posts);

    return "home/profile";
}
그렇게 profile.jsp가 열리면 다음과 같은 화면이 나타나게 html을 작성해 주었다.
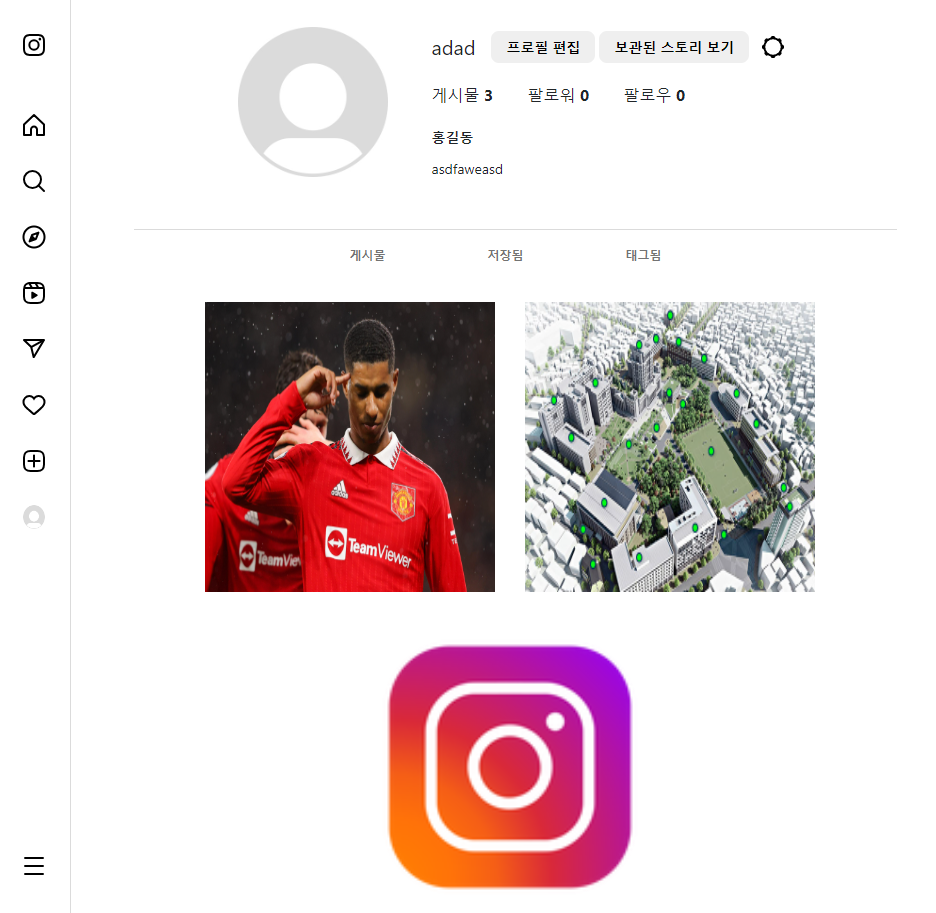
해당 유저의 username과 이름, 한 줄 소개는 아까 컨트롤러에서 Model로 넘겨준 user을 사용하면 쉽게 가져올 수 있었다.
게시물의 수와 팔로잉 정보 역시 post와 user을 이용하면 쉽게 가져올 수 있다.
문제는 게시물인데, 게시물의 첫 번째 사진을 미리보기로 띄워야 한다.
각 게시물에 업로드된 사진들은 /posts/<포스트 id>/n.jpg로 저장된다. 첫 번째 사진은 항상 0.jpg이다.
그래서 이걸 어떻게 활용했나 ?! 아래의 코드를 보면 바로 이해될 것이다.
<div id="profile_postbox" style="width: 90%; height: 100%; padding-left: 30px; padding-right: 50px; display: flex; justify-content: center;">
    <c:choose>
        <c:when test="${posts.size() eq 0}">
            <div id="NoPostsBox" style="margin-top: 50px; display: flex; flex-direction: column; align-items: center; text-align: center;">
                <img src="/image/profile/noPostsCamera.png" style="margin-bottom: 16px">
                <span style="font-size: 30px; font-weight: bold; margin-bottom: 10px">사진 공유</span>
                <span style="font-size: 14px; margin-bottom: 16px">사진을 공유하면 회원님의 프로필에 표시됩니다.</span>
                <a href style="text-decoration: none;"><span style="color: #0095f6; font-weight: bold; font-size: 14px">첫 사진 공유하기</span></a>
            </div>
        </c:when>
        <c:otherwise>
            <div id="postBox" style="width: 100%; max-width: 963px; display: flex; flex-wrap: wrap; justify-content: center">
                <c:forEach var="post" items="${posts}">
                    <div id="tmpBox" style="width: 300px; height: 300px; margin: 10px; cursor: pointer" onclick="gotoPost('/post/${post.id}')">
                        <img class="post" src="/posts/${post.id}/0.jpg" style="width: 290px; height: 290px">
                    </div>
                </c:forEach>
            </div>
        </c:otherwise>
    </c:choose>
</div>
Model에 post를 넘기니... 그냥 프론트의 모든 요소들을 손쉽게 가져올 수 있었다...
'프로젝트 > Kimstagram' 카테고리의 다른 글
| [내멋대로 만드는 Kimstagram] 7. 게시물 좋아요 구현하기 (0) | 2024.01.21 |
|---|---|
| [내멋대로 만드는 Kimstagram] 6. 게시글 화면 구현과 댓글 작성하기 (0) | 2024.01.21 |
| [내멋대로 만드는 Kimstagram] 4. 글쓰기 구현하기 (0) | 2024.01.16 |
| [내멋대로 만드는 Kimstagram] 3.Spring Security + JWT 로그인 구현하기 (1) | 2024.01.09 |
| [내멋대로 만드는 Kimstagram] 2. 로그인, 회원가입 구현하기 (0) | 2024.01.07 |


